Ubuntu Installation
DISCLAIMER!!!!!!!
This guide intends to help you to install ubuntu alongside windows. I will try my best to keep it as simple as possible and readable by everyone. But I AM NOT RESPONSIBLE for any broken laptops or lost data. Make BACKUPS before you start.
Step I: Preparing for installation
1.1 Downloads
It is helpful if you download all the resources that you need right in the beginning. Note these downloads may take some time.
- Ubuntu 16.04 64-bit Desktop (Note you can download any version you want and follow the same steps)
- PowerISO
1.2 Creating Partitons
-
The first thing you need to take care of is to create free space on the computer hard disk in case the system is installed on a single partition.
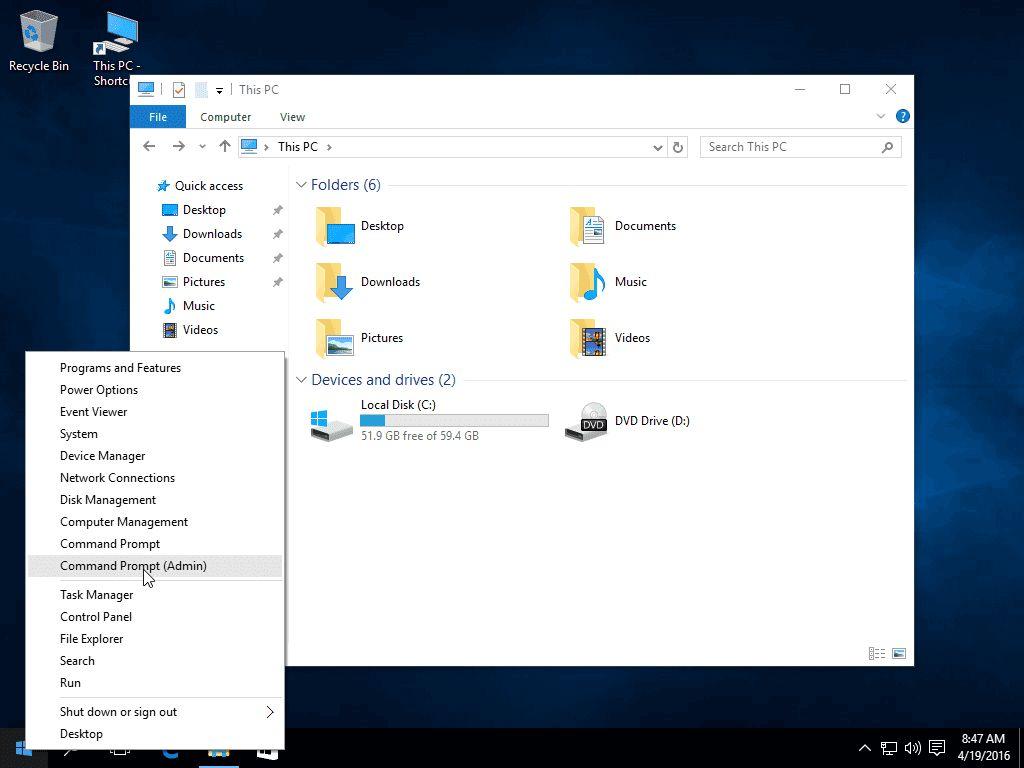
Login to your Windows machine with an administrative account and right-click on the Start Menu -> Command Prompt (Admin) in order to enter Windows Command Line. -
Once in CLI, type diskmgmt.msc on prompt and the Disk Management utility should open. From here, right click on C: partition and select Shrink Volume in order to resize the partition.
C:\Windows\system32\>diskmgmt.msc
-
On Shrink C: enter a value on space to shrink in MB (use at least 30000 MB depending on the C: partition size)(60000 MB recommended) and hit Shrink to start partition resize as illustrated below (the value of space shrink from below image is lower and only used for demonstration purposes).
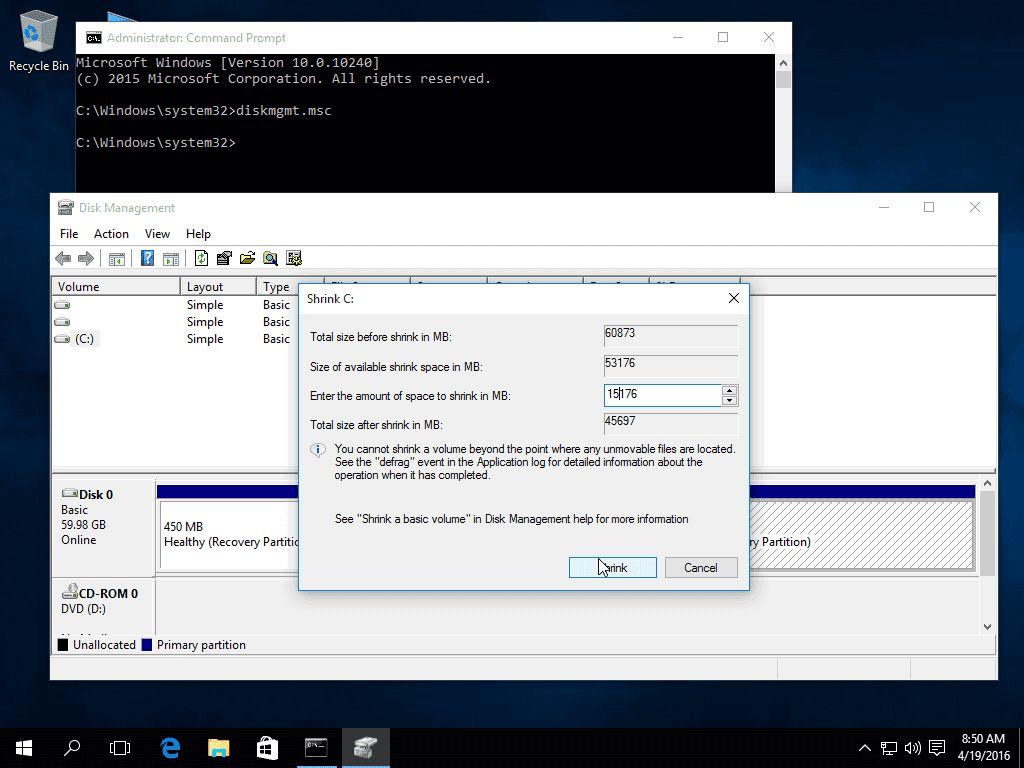
Once space has been resized you will see a new unallocated space on the hard drive. Leave it as default and reboot the computer in order to proceed with Ubuntu 16.04 installation.
1.3 Making a bootable
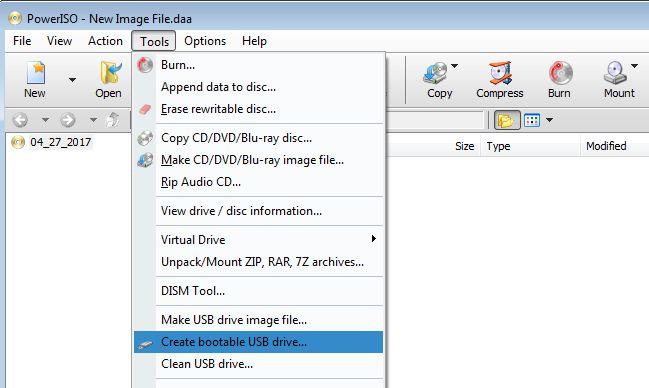
- Install the PowerISO in windows and open it.
- Insert the USB drive you intend to boot from.
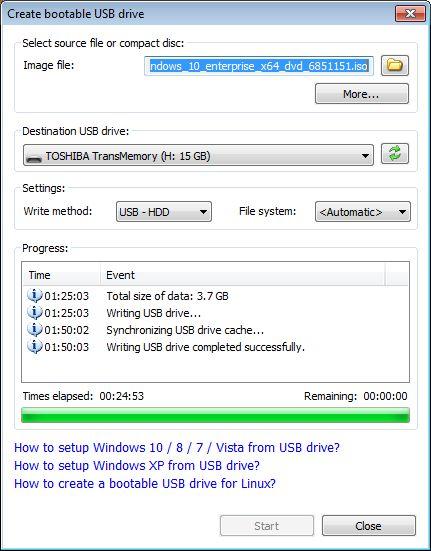
- Choose the menu "Tools > Create Bootable USB Drive". The "Create Bootable USB Drive" dialog will popup. If you are using Windows Vista or above operating system, you need to confirm the UAC dialog to continue.
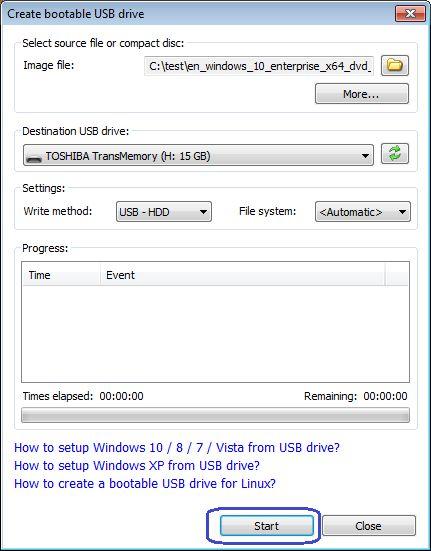
- In "Create Bootable USB Drive" dialog, click "..." button to open the iso file of Windows operating system.
- Select the correct USB drive from the "Destination USB Drive" list if multiple USB drives are connected to the computer.
- Choose the proper writing method. "USB-HDD" is recommended.
- Click "Start" button to start creating a bootable USB drive.
- PowerISO will alert you that all data on the USB drive will be destroyed. Click "OK" to continue.
The program will start writing the USB drive, and showing the progress information. You should get the message “Writing USB drive completed successfully.” after the operation completes.
Step II: Make a Backup
This is to emphasize that you can lose your data if something went wrong, so it is better to make a backup of some really important files now.
Step III: Installing Ubuntu
- Place the USB stick or DVD in the appropriate drive, reboot the machine and instruct the BIOS/UEFI to boot-up from the DVD/USB by pressing a special function key (usually F12, F10 or F2 depending on the vendor specifications).
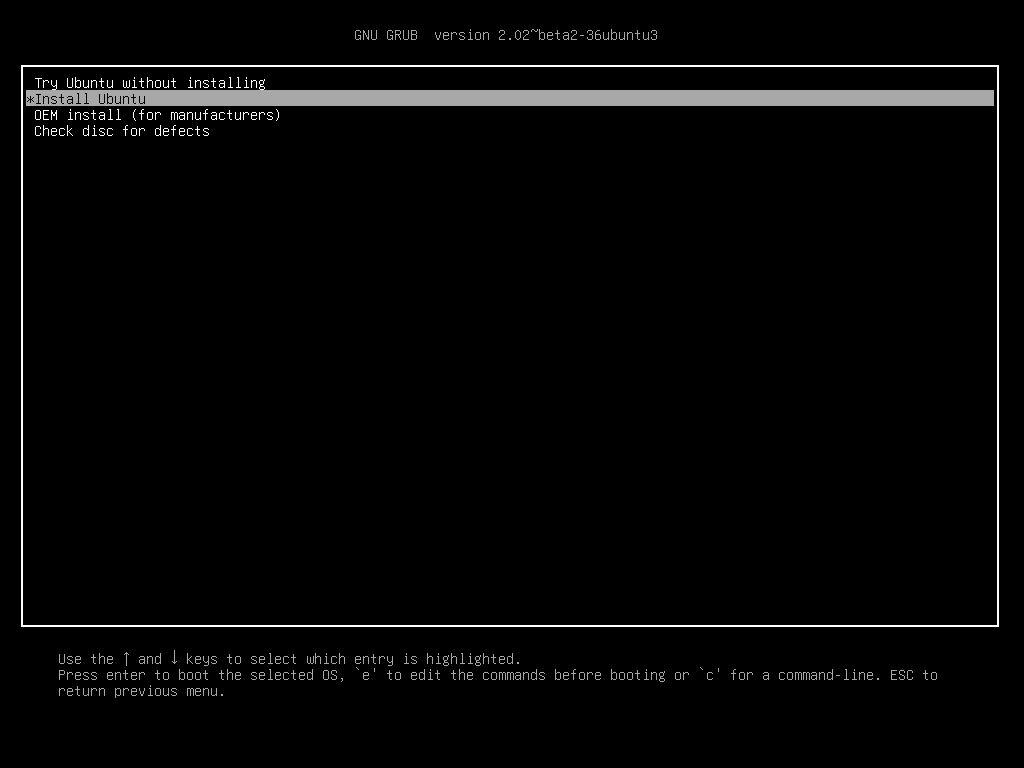
- Once the media boot-up a new grub screen should appear on your monitor. From the menu select Install Ubuntu and hit Enter to continue.
- After the boot media finishes loading into RAM you will end up with a completely functional Ubuntu system running in live mode.
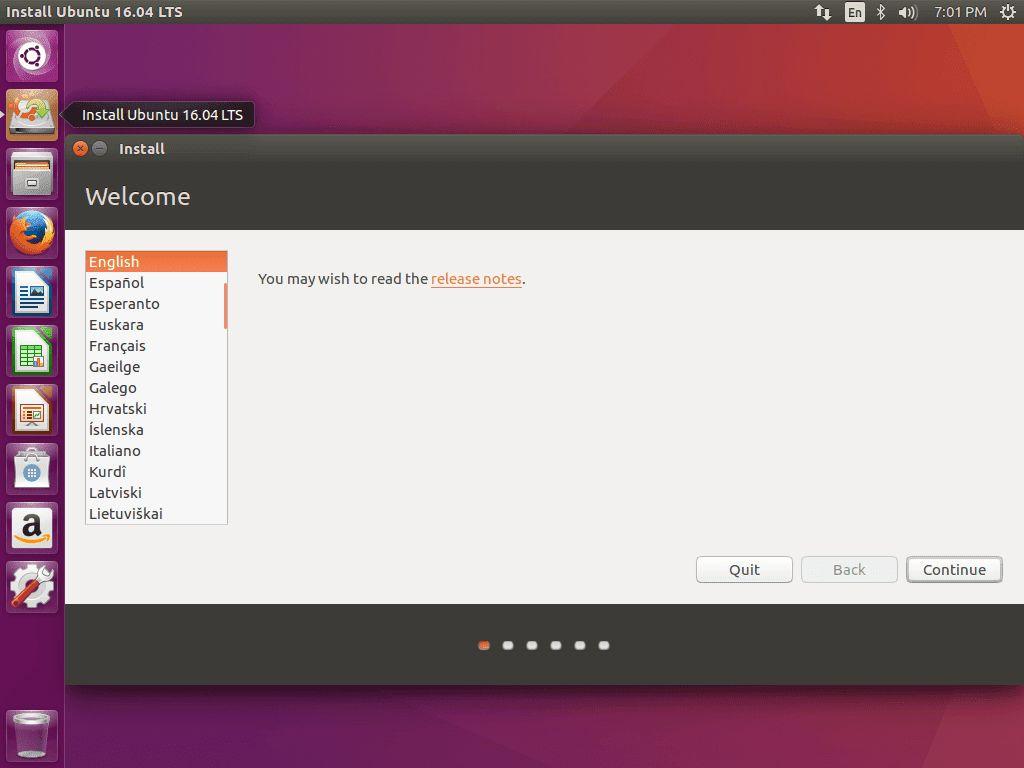
- On the Launcher hit on the second icon from top, Install Ubuntu 16.04 LTS, and the installer utility will start(this may also start automatically). Choose the language you wish to perform the installation and click on the Continue button to proceed further.
- Now select the second option if you wish to have the third party softwares or multimedia drivers preinstalled.
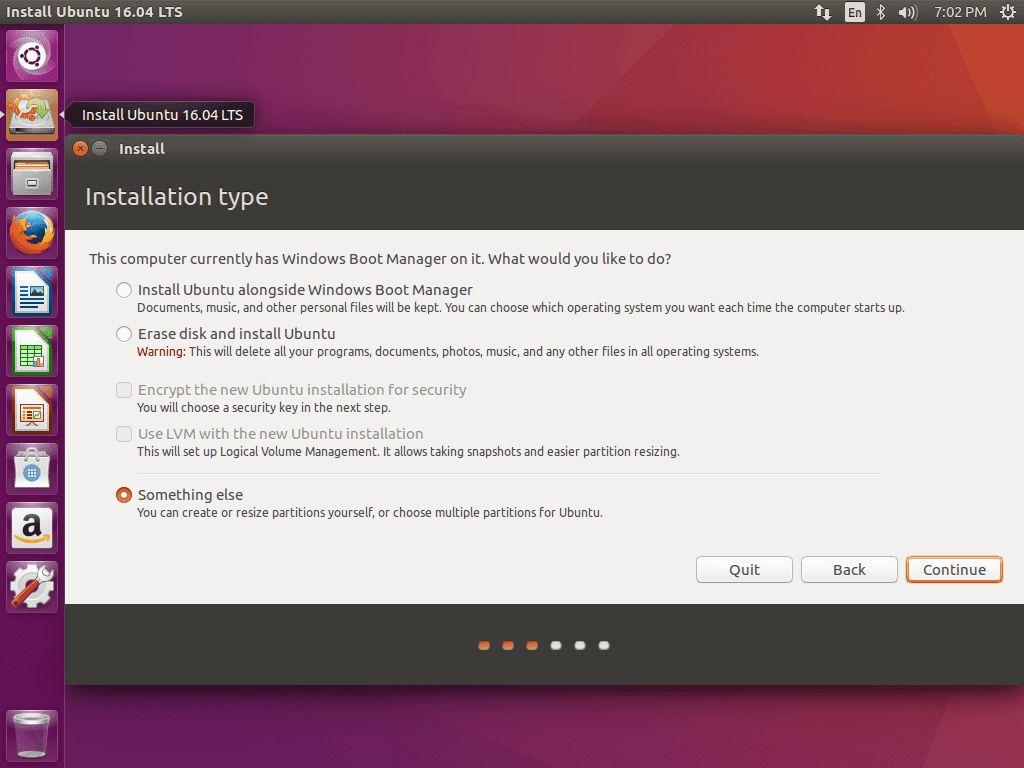
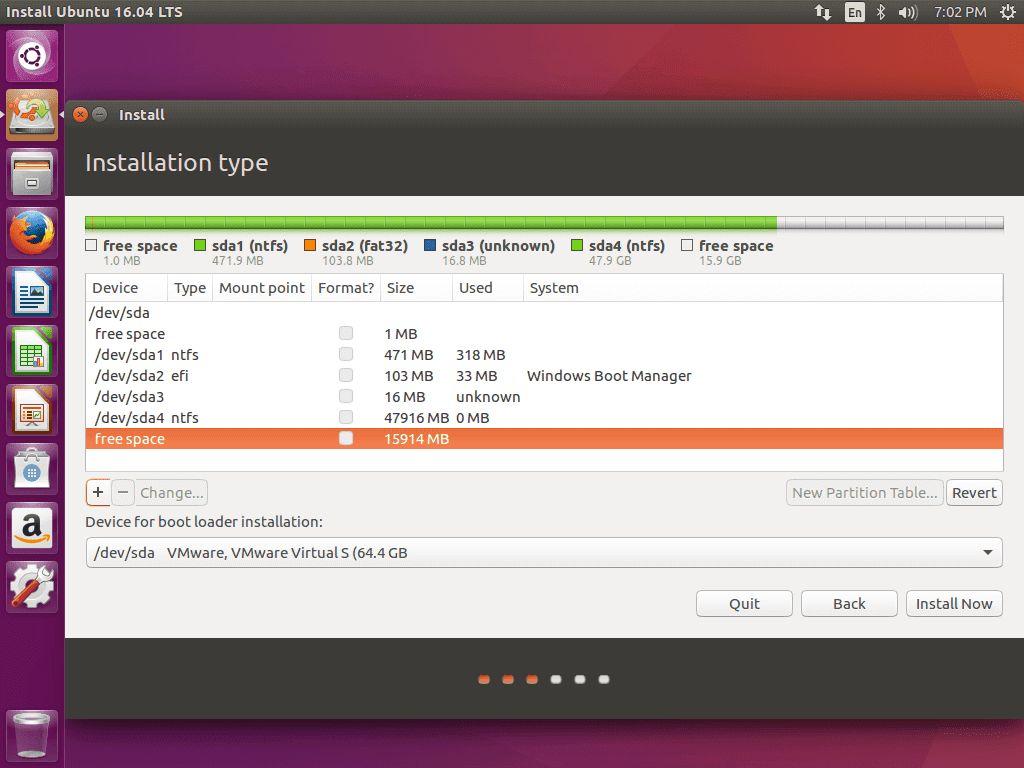
- Now it’s time to select an Installation, check the Something else option and hit on Continue button to proceed further.
The option Erase disk and install Ubuntu should be avoided on dual-boot because is potentially dangerous and will wipe out your disk. -
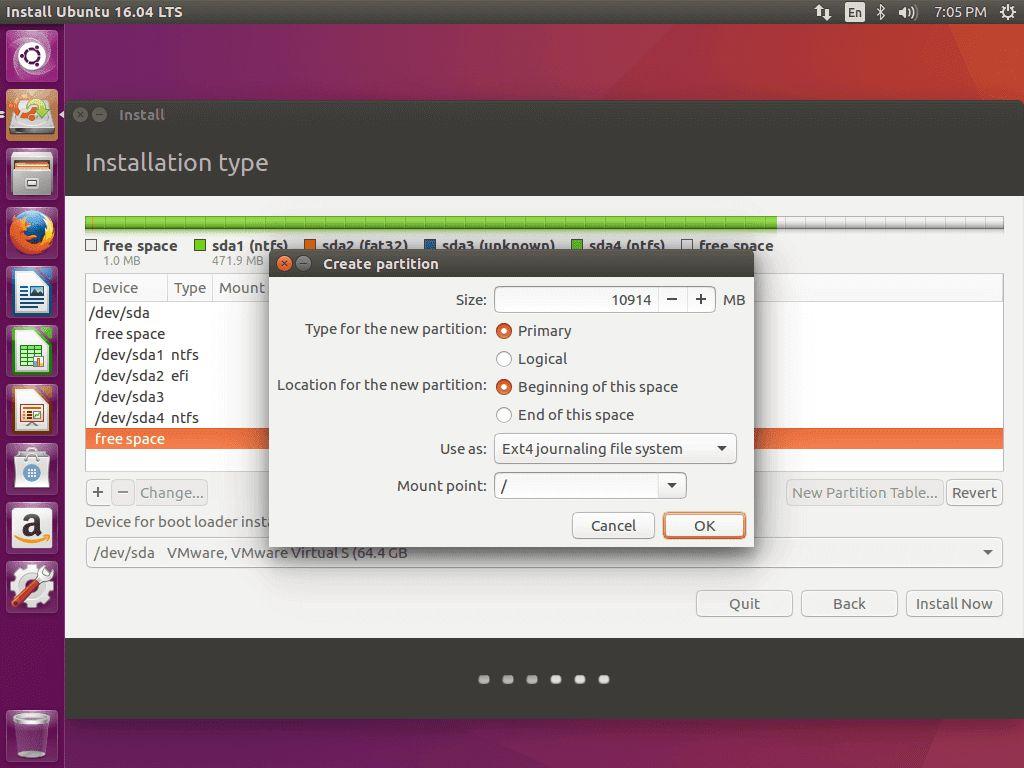
On this step, we’ll create our custom partition layout for Ubuntu 16.04. On this guide will recommend that you create two partitions, one for root and the other for the swap. To create the first partition, the root partition, select the free space (the shrink space from Windows created earlier) and hit on the + icon below. On partition settings use the following configurations and hit OK to apply changes:
- Size = at least 30000 MB (this would be whatever space you have shrunk minus 10000MB)
- Type for the new partition = </b>Primary</b>
- Location for the new partition = Beginning
- Use as = EXT4 journaling file system
- Mount point = /
- Then click on the 10000MB free space again and hit the plus button this time select
- Use as = SWAP Area
- And hit OK.
- When finished, hit the Install Now button in order to apply changes to disk and start the installation process.
- A pop-up window should appear to inform you about swap space. Ignore the alert by pressing on the Continue button.
- Next, a new pop-up window will ask you if you agree with committing changes to disk. Hit Continue to write changes to disk and the installation process will now start.
- On the next screen adjust your machine physical location by selecting a city nearby from the map. When done hit Continue to move ahead.
- Next, select your keyboard layout and click on the Continue button.
- Pick up a username and password for your administrative sudo account, enter a descriptive name for your computer and hit Continue to finalize the installation.
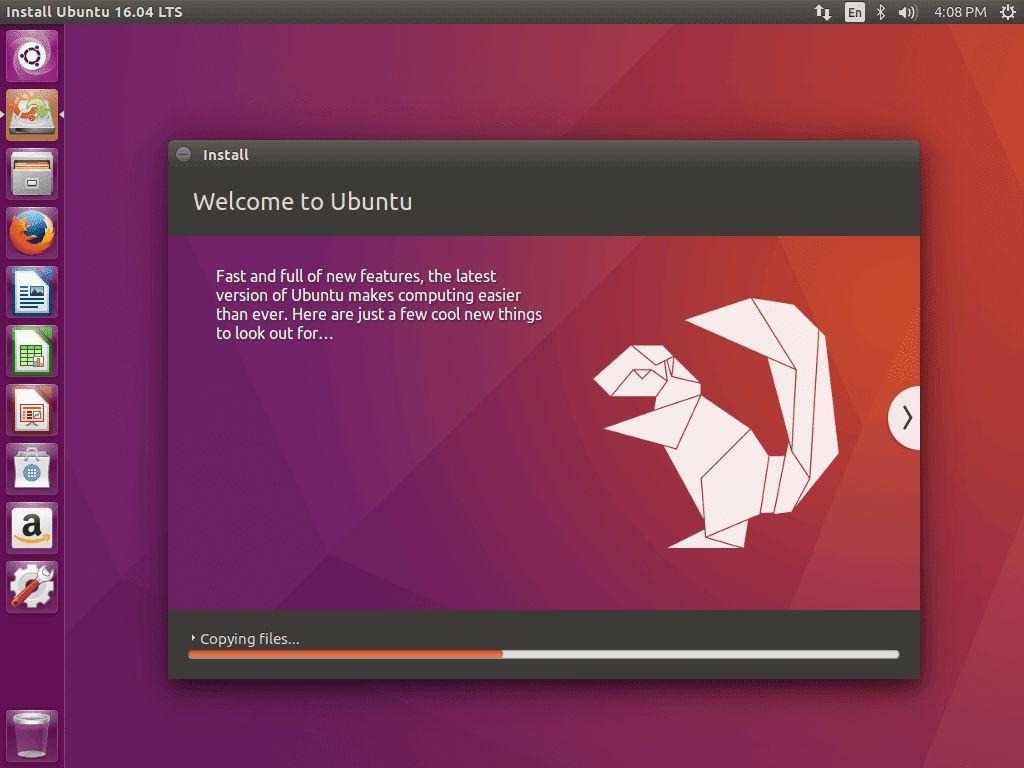
- These are all the settings required for customizing Ubuntu 16.04 installation. From here on the installation process will run automatically until it reaches the end.
- After the installation process reaches its end hit on Restart Now button in order to complete the installation.
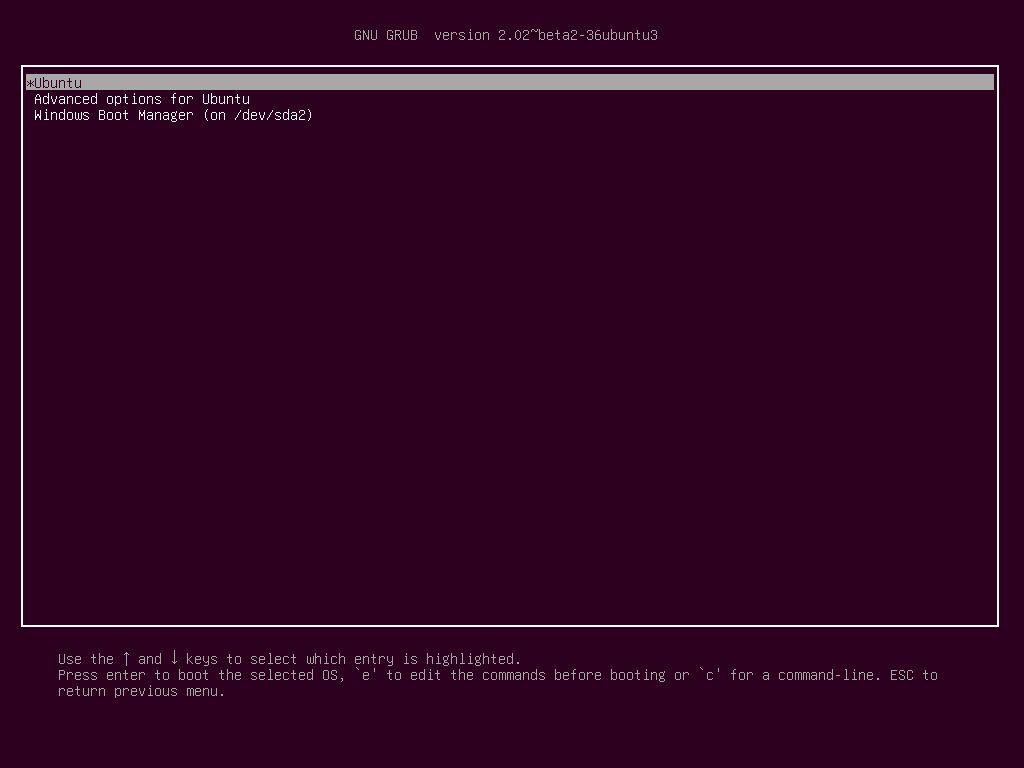
- The machine will reboot into the Grub menu, where for ten seconds, you will be presented to choose what OS you wish to use further: Ubuntu 16.04 or Microsoft Windows.

Congrats, now you should have Ubuntu installed on your system
Troubleshooting
Boot Repair
Many times after installation, the grub is not configured properly. This may result in your device unable to boot into neither ubuntu nor windows and showing you a blank screen with something like “Grub Recovery” written on it. To fix this you can follow the following steps.
- Insert the bootable USB drive, and boot into it. (Follow Step III.1 from above)
- In the menu as shown below, select the Try Ubuntu option. This should open a live Ubuntu session
- Now open the terminal, either by pressing Start key and seacrhing for "terminal" (OR) pres Ctrl + Alt + T .
- Connect to the Internet.
- Type the following commands one by one and hit Enter
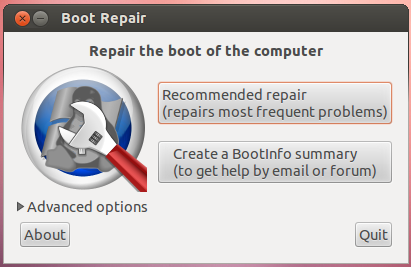
sudo add-apt-repository ppa:yannubuntu/boot-repair sudo apt-get update sudo apt-get install -y boot-repair sudo boot-repair - After the commands are executed, a window should pop up, select Recommended Repair option in that.
 Restart your computer and remove the bootable drive. (Can do a force restart if it gets stuck)</li>